Exchange and Outlook use the term “Delegate” for another individual to whom you would like to grant access permissions to a part of your account. Delegate access is used specifically when you are attempting to allow another user in the Exchange environment to interact with other members of your organization on your behalf. This could simply be because you would like an assistant to manage your contacts, calendar or email on your behalf. This post steps you through how to setup delegate access for the various parts of your account using Microsoft Outlook 2007. This document assumes you or someone on your behalf has already setup your account using the method directed by your Exchange administrator. If you are simply trying to allow direct access to a folder in your account, that is done through folder sharing and its associated permissions. If you wanted to learn how to setup permissions to share a folder click either Outlook 2007 or Outlook 2011 depending on which platform you are using.
- Launch Outlook 2007 and select “Options” from the “Tools” menu.

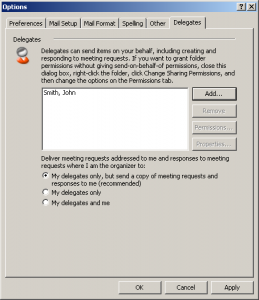
- Select the “Delegates” tab in the “Options” dialog box that appears.

- Click the “Add” button (circled in red) on the right side of the Delegates tab.

- The “Add Users” dialog box will appear. Enter part of the name of the user (1) you would like to add as a delegate in the text field to the left of the “Go” button and then click the “Go” button (2). At minimum (if the user exists on the Exchange server), the user’s name should appear in the box below. Select the user you would like to make your delegate (3) and click the “Add” button (4). The user’s name will be added to the right of the “Add” button. When finished adding users, click the OK button (5).

- After clicking “OK”, the “Delegate Permissions:” dialog box will appear. Select the permissions levels you would like the delegate to have for each of the elements of your mailbox. In our example, we are going to be granting John “Editor” privileges for Jane Doe’s Calendar. You can set whatever permissions level you would prefer your delegates to have. When you have made your selections, click the OK button.

- The name of the user to which you granted delegate rights, should now appear in the “Delegates” box. Click the “Apply” and the “OK” button.

- If everything worked correctly on the server side, then the user you have granted delegate access to should now be able to add your account as an account for which he or she is a delegate for and perform whatever functions to which you have granted them access. If for some reason, the user still can’t connect to your account as a delegate then Tech90 recommends deleting the delegation setup in this guide and follow the instructions here to configure delegate access from a Windows computer running Outlook 2007 or later.

