Outlook, when connected to an Exchange server, provides two different ways to connect to a shared Inbox. The first “Temporary” solution allows a user to very easily connect to another user’s Inbox for which he or she has permissions. This method provides the connection until Outlook is restarted. The second, more “Persistent” solution allows a user to fully map another user’s shared mailboxes to your account so that it appears alongside your data. Aside from providing a more permanent solution, the latter, more "Persistent" option allows for other mailboxes (besides the Inbox) to be mapped within your account in Outlook.
[tab:Temporary]- Launch Outlook and select "Open > Other User’s Folder…" from the "File" menu.

- The "Open Other User’s Folder" dialog box will appear. Either click the "Name…" button to search for the account you are trying to gain access to or enter the user name in the field to the right of the "Name…" button. Click the "OK" button to submit your request.

- The "Open Other User’s Folder" dialog box will disappear, and the requested folder will be displayed in the Outlook message pane.


- Launch Outlook and select the "Account Settings…" option within the "Tools" menu.

- The "Account Settings" dialog box will appear. Select your Exchange account and then click the "Change…" button.

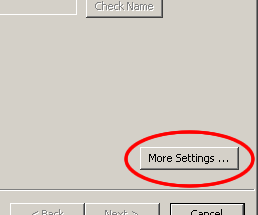
- The "Change E-mail Account" dialog box will appear along with the basic settings for your Exchange account. Click the "More Settings…" button in the bottom-right corner of the window.

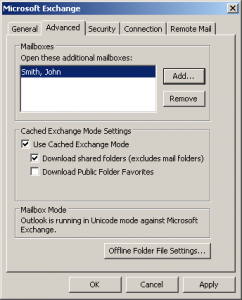
- The "Microsoft Exchange" window will appear. Click the "Advanced" tab to make it active.

- Click the "Add…" button.

- The "Add Mailbox" dialog box will appear. Enter the name of the person whose mailbox you are trying to connect and click the "OK" button to submit your request.

- If the server recognizes the name of the user entered in the previous step, the "Add Mailbox" dialog box will disappear and the name of the requested individual will be added to the list of Mailboxes below the field titled "Open these additional mailboxes". Click the "Apply" button followed by the "OK" button to submit the requested options.

- The "Add Mailbox" dialog box will disappear, making the "Change E-mail Account" dialog box will again be the active window. Click the "Next" button

- Click the "Finish" button to submit the requested changes.

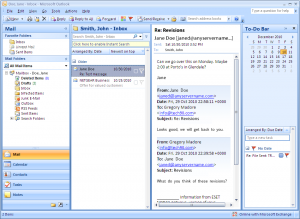
- The "Change E-mail Account" dialog box will disappear and the newly mapped account will appear beneath your mail folders.

- Click the small "+" (circled in red) to reveal the folders you have been granted permission to access.


- Your ability to perform functions on the data contained within the folder is governed by the permissions set by the individual who administers the user or group. Feel free to contact us or open a ticket should you run into any problems.

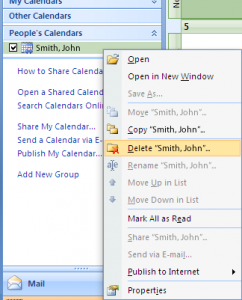
…it is most likely due to the fact that the delegator didn’t make his or her account visible to you, the delegate. You can have the delegator follow this procedure to complete that step.

